Storage Bins With Lids: Keep Things Protected and Searchable
Learn how to use storage bins with lids without creating mystery bins. Number bins, photograph contents, save locations, and search later.
By Ben Stallsworth · Co-Founder, Totely
July 8, 2026 · Updated August 27, 2026 · 14 min read
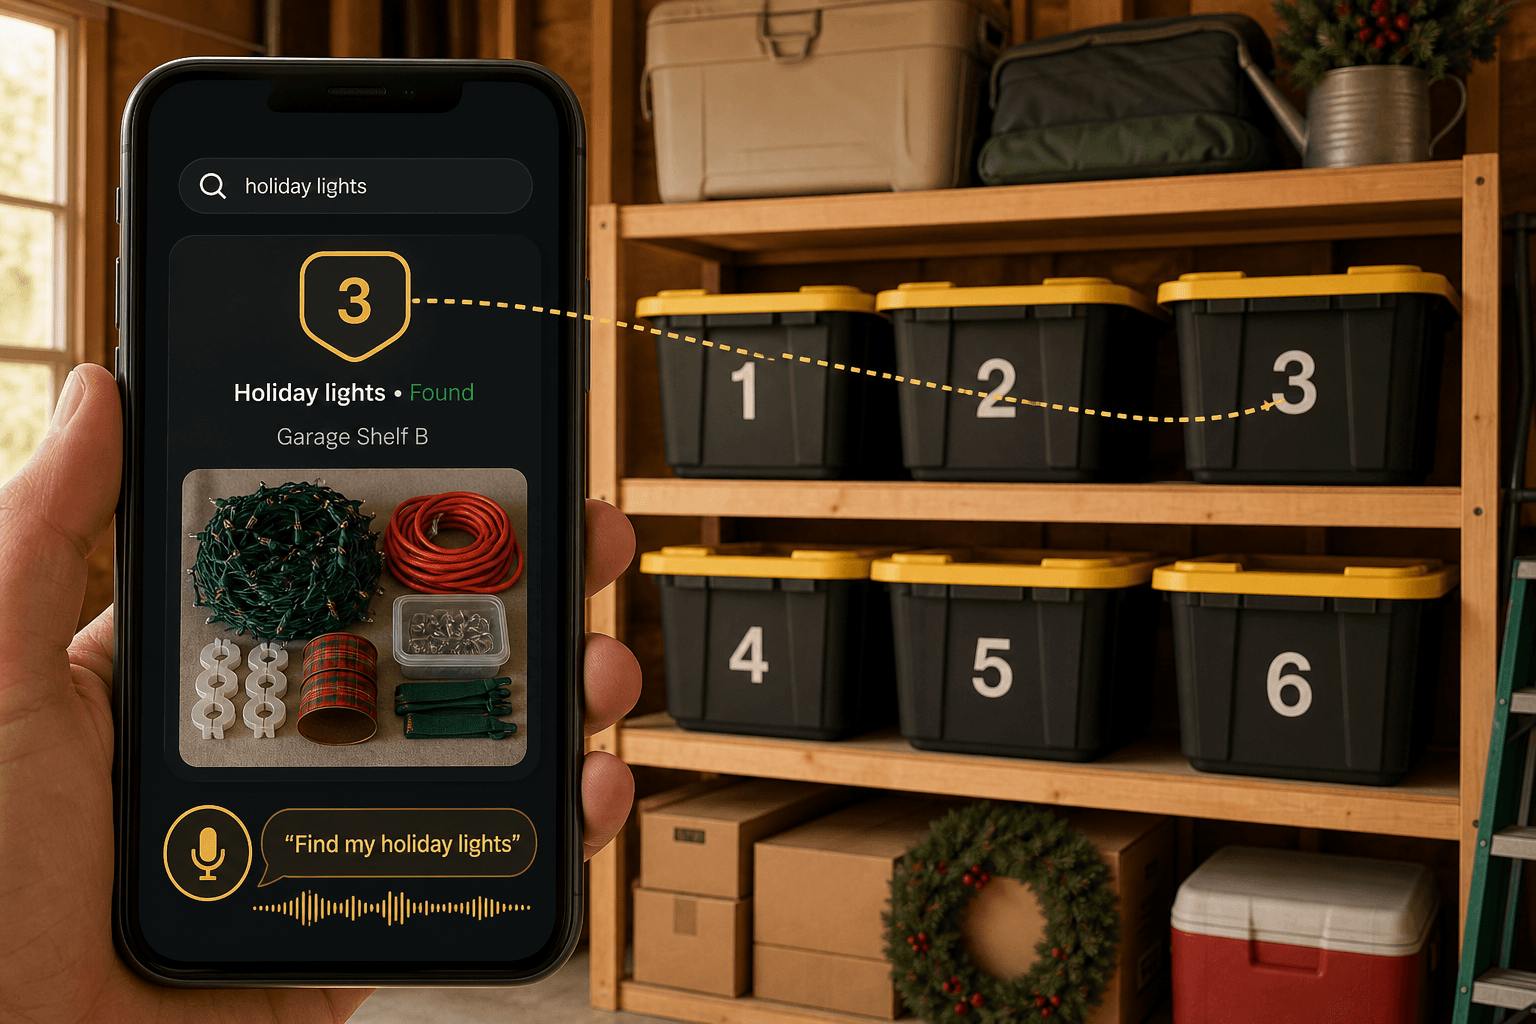
Storage bins with lids are one of the easiest ways to make a closet, garage, attic, basement, storage unit, or spare room feel instantly more organized.
You put the lid on. You stack the bin. The shelf looks cleaner. The floor clears up. Everything feels more contained.
Then three months later, you need one thing.
The holiday lights. The guest sheets. The kids' winter gloves. The extension cord. The baby clothes in the next size up. The coffee maker you packed away during the move.
Now the lid that protected everything is also hiding everything.
That is the tradeoff with lidded bins: they are great for containing and protecting household items, but they can easily become mystery storage if you do not give each bin a simple memory system.
The goal is not to stop using lidded bins. They are useful. The goal is to use them in a way that keeps your storage protected and searchable.
Quick Links
Why Lidded Bins Work So Well
Lidded bins are popular because they solve several household storage problems at once.
They help keep groups of items together. They make loose items easier to move. They can reduce visible clutter. They can protect items from dust. They make shelves look calmer. And when they are sturdy and stackable, they can help you use vertical space more efficiently.
That makes them especially useful for:
- Seasonal decor
- Holiday lights
- Kids' clothes
- Baby clothes
- Guest linens
- Camping gear
- Sports gear
- Craft supplies
- Garage tools
- Household backstock
- Moving overflow
- Storage unit boxes
- Attic and basement storage
Kids' clothes change size and season quickly. When those bins fill with hand-me-downs and next-size pieces, clothes stored in totes stay useful if size (and season) are part of the record.
The lid is the feature that makes the bin feel tidy.
But the lid also creates the problem: once it is closed, you need a way to remember what is inside.
Where Storage Bins With Lids Work Best
Storage bins with lids are best for items that are grouped, dry, sturdy enough to store together, and not needed every day.
Seasonal storage
Seasonal items are a natural fit.
Use lidded bins for holiday decor, Christmas lights, Halloween decorations, winter gloves, beach towels, patio cushion covers, camping supplies, sports gear, and off-season clothing.
The key is to group by retrieval moment, not just by category.
For example:
Bin 1: outdoor holiday lights, extension cords, spare bulbs, light clipsBin 2: gift wrap, ribbon, tags, tape, tissue paperBin 3: kids' winter gloves, hats, snow pants, bootsBin 4: camping lantern, tent stakes, headlamps, compact stoveBin 5: beach towels, goggles, sunscreen pouch, swim bags
That way, when the season changes, you are not opening every bin to find one small item.
Garage and utility storage
Garages are full of things that need containers: extension cords, work gloves, small tools, batteries, bike pumps, bungee cords, tape, cleaning supplies, and household hardware.
Lidded bins can work well here because garage shelves often collect dust and loose items quickly. But garage bins need clear access rules.
Do not create one giant "garage stuff" bin.
Instead, keep bins specific enough to be useful:
Bin 1: extension cords, work gloves, tape, cable tiesBin 2: bike pump, spare lights, helmet pads, tire leversBin 3: batteries, flashlight, charger cables, small toolsBin 4: garden gloves, sprinkler parts, hose washers, plant ties
The tighter the contents, the easier the bin is to search later.
Linens and household overflow
Lidded bins can be helpful for guest sheets, extra towels, quilts, pillowcases, blankets, table linens, and spare bedding.
For soft goods, make sure everything is clean and fully dry before packing. If the bin will sit in a garage, attic, basement, shed, or storage unit, think carefully about moisture, heat, humidity, pests, and whether the item would be better stored indoors or in climate-controlled space.
A good linen setup might look like:
Bin 1: guest sheets, pillowcases, extra towelsBin 2: winter blankets, flannel sheets, quiltBin 3: table linens, napkins, holiday placematsBin 4: kids' sleeping bags, travel pillows, spare bedding
Moving and delayed unpacking
Moving boxes and bins often stay packed longer than expected.
A lidded bin can be better than a cardboard box for certain items, especially if the bin will be reopened many times. But it still needs a system.
For moving, use simple numbers and destination notes:
Bin 1: coffee maker, mugs, filters — kitchenBin 2: towels, bath mat, shower curtain — bathroomBin 3: chargers, remotes, cables — living roomBin 4: kids' bedtime books, pajamas, nightlight — bedroom
This helps when the move is over but half the house is still in containers.
Where Lidded Bins Can Fail
A lid helps protect the contents, but it does not make every item safe to store anywhere.
Lidded bins can create problems when:
- Items are damp before packing
- The storage area is hot, humid, or pest-prone
- The bin traps moisture or odors
- Delicate materials need airflow
- Important papers or photos need safer storage
- Electronics sit in poor temperature or humidity conditions
- Too many unrelated categories are mixed together
- Bins are stacked so deep that you cannot access the one you need
- The outside label is vague or outdated
A lidded bin is not automatically archival storage, waterproof storage, fireproof storage, food-safe storage, or climate-controlled storage.
Be especially careful with:
- Printed photos
- Important documents
- Leather
- Delicate fabrics
- Wool, silk, lace, or cashmere
- Electronics
- Food or pet food
- Damp textiles
- Highly valuable or irreplaceable items
Totely can help you remember what is inside a bin, but it does not replace proper storage materials, safety guidance, product labels, manufacturer instructions, insurance records, facility rules, or professional preservation advice.
What to Put in Each Bin
The best lidded-bin system starts with one simple rule:
One bin should have one clear job.
That does not mean every bin holds only one item. It means the items inside should make sense together. For a common household size, use what to put in each 27 gallon bin as a packing template.
Good bin groupings
These are easier to maintain:
- Holiday lights, extension cords, spare bulbs, hooks
- Guest sheets, towels, pillowcases, blankets
- Camping lantern, tent stakes, headlamps, compact stove
- Kids' winter coats, gloves, hats, boots
- Craft paper, ribbon, scissors, tape, glue sticks
- Bike pump, spare lights, gloves, small repair tools
- Printer ink, label rolls, charger cables, office supplies
- Baby clothes by size range
Weak bin groupings
These become mystery bins fast:
- Random garage stuff
- Mixed holiday and tools
- Kitchen and office overflow
- Kids' clothes plus keepsakes plus documents
- Craft supplies plus electronics
- Heavy tools mixed with fragile decor
- Anything labeled only "misc"
If a bin has too many jobs, split it.
If you cannot split it, photograph the contents and write down the important items.
The Simple Number System for Lidded Bins
The outside of the bin should stay simple.
Use a large visible number: 1, 2, 3, 4, 5.
That number becomes the bin's identity.
Then keep the specific contents in your inventory.
For example:
| Bin | Location | Key contents | Notes |
|---|---|---|---|
| Bin 1 | Garage shelf A | holiday lights, extension cords, spare bulbs | seasonal |
| Bin 2 | Hall closet top shelf | guest sheets, towels, pillowcases | front access |
| Bin 3 | Storage unit front left | kids' winter coats, gloves, boots | check sizes |
| Bin 4 | Basement shelf B | camping lantern, tent stakes, headlamps | outdoor gear |
| Bin 5 | Office closet floor | printer ink, label rolls, charger cables | backstock |
This is better than writing long category labels directly on the bin because contents can change.
The number stays stable. The digital record can be updated.
That gives you the best of both worlds: simple outside, specific inside.
How to Store Lidded Bins So You Can Reach Them
A good lidded-bin system is not only about what goes inside. It is also about where the bins live.
Keep frequently used bins easier to reach
Put bins you use often at eye level, waist level, near the front of a closet, or on the most accessible garage shelf.
This might include:
- Guest linens
- Kids' current-size clothes
- Sports gear
- Tools
- School supplies
- Office backstock
- Seasonal items coming up soon
Do not bury these behind furniture or under five heavy bins.
Put long-term bins higher, lower, or farther back
Long-term bins can go in less convenient locations if they are safe and stable.
This might include:
- Outgrown baby clothes
- Archived paperwork
- Extra decor
- Keepsakes
- Off-season items
- Rarely used kitchen overflow
Still number and photograph them. "Long-term" does not mean "forgotten."
Avoid unsafe stacks
If bins are stackable, use that feature thoughtfully.
A stackable storage bin is only useful if you can remove it safely later. Put heavier bins lower. Put lighter bins higher. Avoid stacking fragile items under weight. Keep the number visible from the aisle or room.
A stack might be:
- Bottom: tools and garage items
- Middle: holiday lights and outdoor decor
- Top: lightweight linens or seasonal clothing
If you have to unstack five bins to find one small item, the system is working too hard.
Use shelf zones
Shelf zones make storage easier to remember.
Use simple locations like:
- Garage shelf A
- Garage shelf B
- Hall closet top shelf
- Basement shelf left
- Storage unit front right
- Under-bed left
- Office closet floor
Pair the number with the location.
Example: Bin 4 — Garage Shelf B — camping lantern, tent stakes, headlamps.
That is much more useful than "camping stuff somewhere in the garage." For rack rows and slots as a full organizer layout, see storage tote organizer plans.
Photograph the Contents Before You Close the Lid
A photo gives the bin a memory.
Before you close the lid, take one clear photo of the contents. If the bin has layers, take a photo of the top layer and add a note for anything important underneath.
This helps with:
- Holiday bins
- Kids' clothing bins
- Craft supplies
- Garage hardware
- Keepsakes
- Moving bins
- Small business supplies
- Guest linens
- Camping gear
- Office backstock
The photo does not need to be beautiful. It needs to be useful.
Make sure the searched item is visible when possible. If you know you will search for "holiday lights," make sure the lights are visible in the photo. If the bin contains "guest sheets," show the sheets clearly before closing it.
A quick photo can save you from opening every bin later.
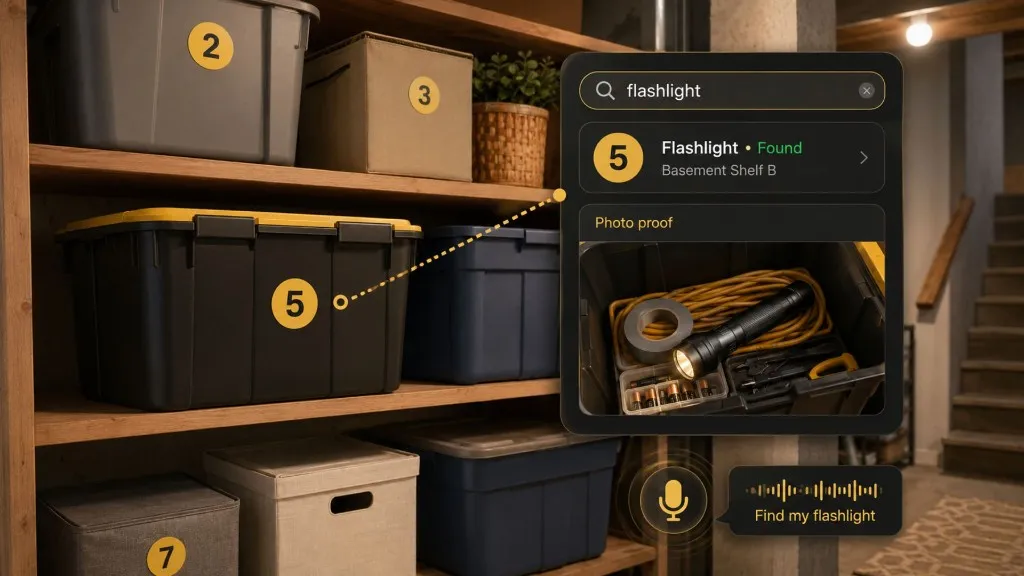
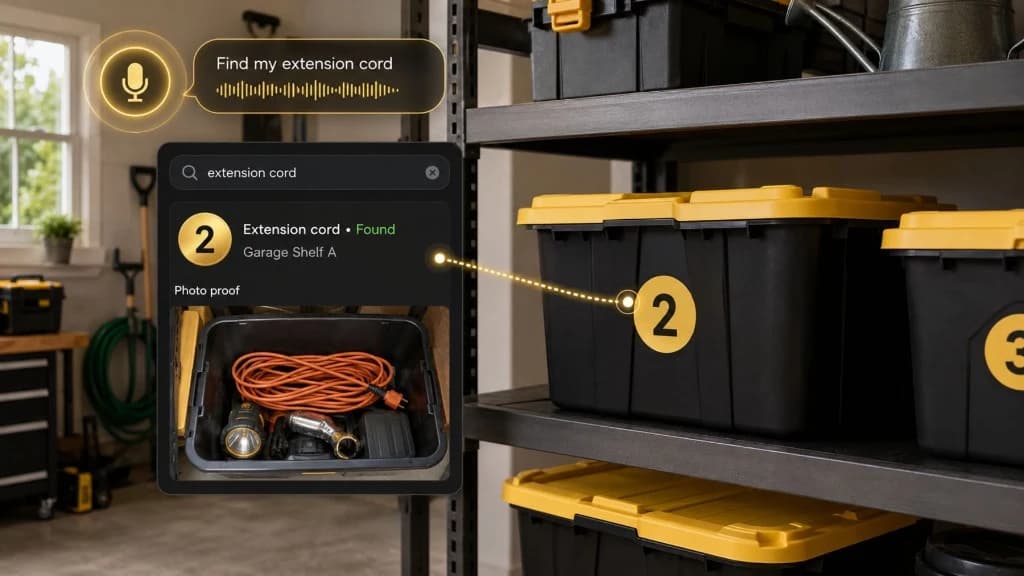
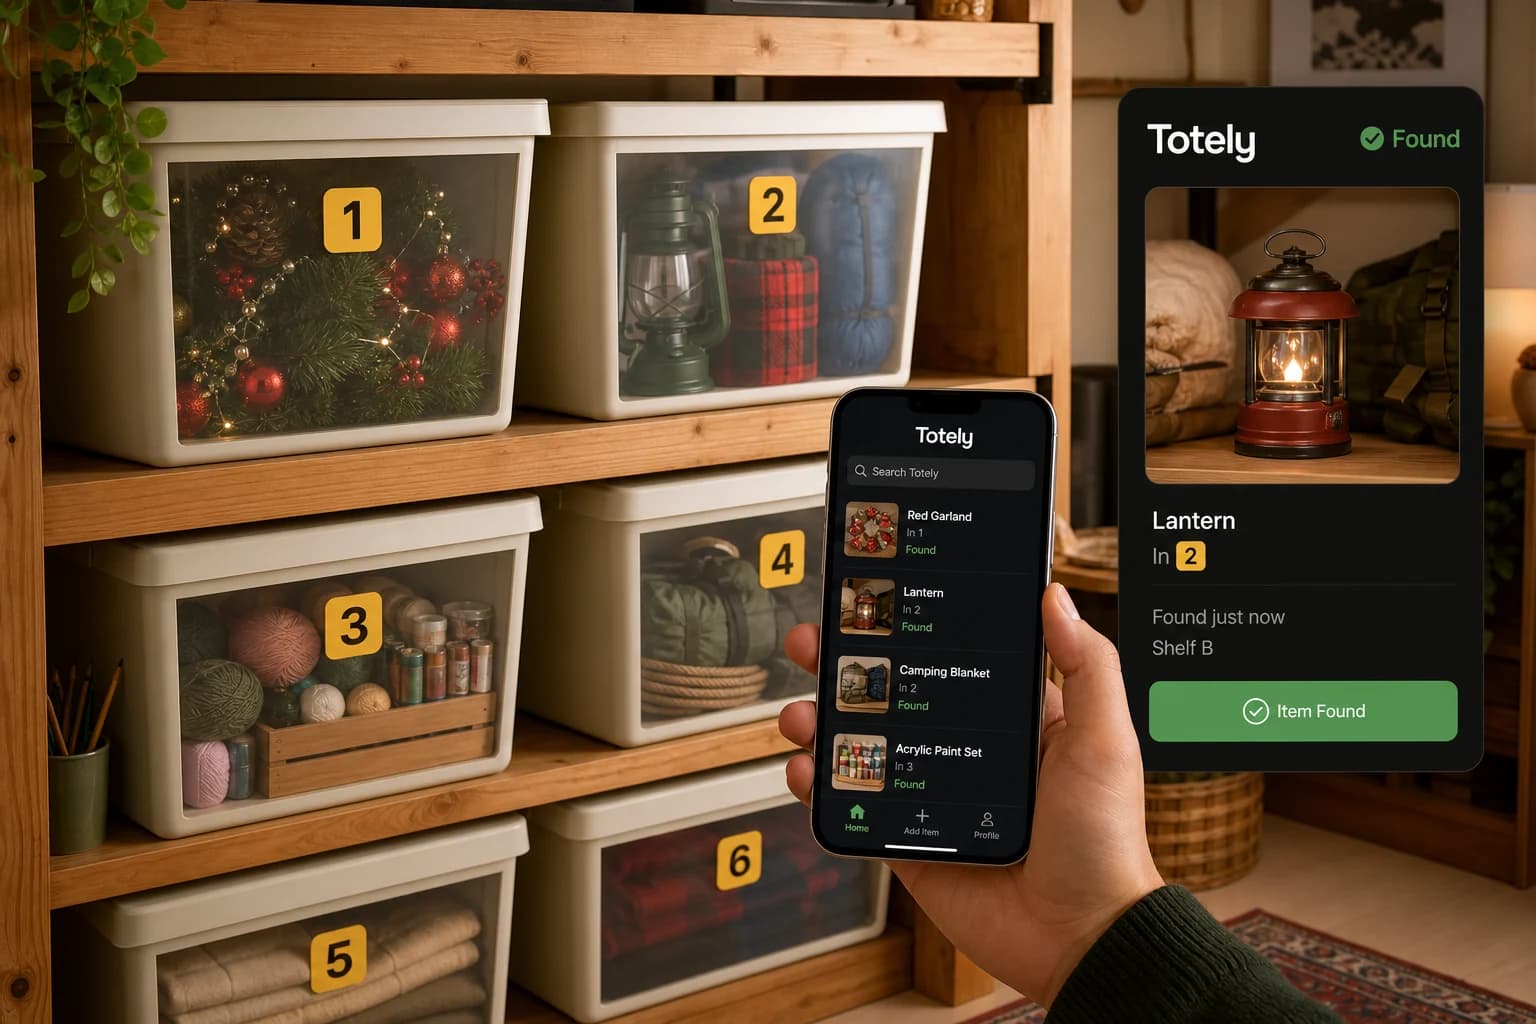
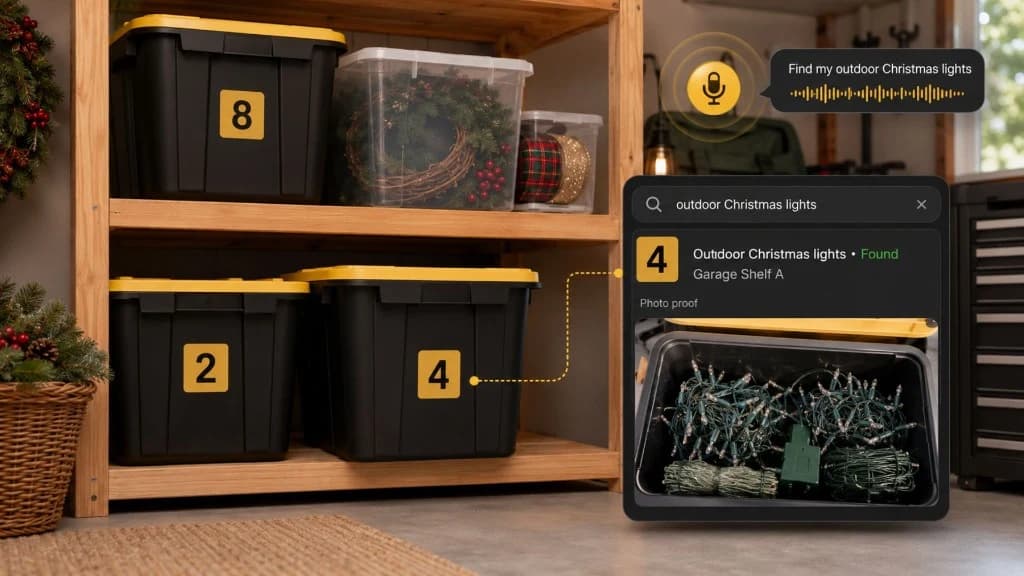
How Totely Makes Storage Bins With Lids Searchable
Lidded bins protect and contain items.
Totely helps you find what the lid is hiding.
Here is the simple workflow:
- Number each bin with a simple visible number like
1, 2, 3, 4, 5. - Snap a photo before closing the lid.
- Let AI build the first item list from what it can see.
- Review or edit the record if something important needs a clearer name.
- Save the exact location, such as "Garage Shelf B," "Hall Closet," "Storage Unit Front Left," or "Under Bed Left."
- Add notes for fragile, seasonal, sentimental, front-access, or restock context.
- Search naturally later for "holiday lights," "guest sheets," "winter gloves," "coffee maker," "extension cord," or "printer ink."
- Use photo proof before opening every bin.
Totely does not require machine-readable codes or manually typing every item.
It gives each lidded bin a digital memory layer: simple visible number outside, photo record inside the app, saved location, natural search, and photo proof.
So when the lid hides the contents, Totely remembers them.
A Lidded Bin Setup You Can Copy
Use this simple setup for a garage, closet, basement, attic, or storage unit.
Step 1: Pick one area
Start with one shelf, one closet, or one group of bins. Do not try to organize every storage area in one day.
Good starting points:
- garage shelf
- hall closet
- holiday bins
- kids' clothing bins
- guest linens
- camping gear
- office supplies
- storage unit front zone
Step 2: Group items by retrieval
Ask, "When would I need these items?"
Group items by real-life use:
- winter
- guests
- camping
- holidays
- school
- moving
- sports
- office
- baby clothes
- tools
Step 3: Number the bins
Use simple numbers: Bin 1, Bin 2, Bin 3.
Keep the number large enough to see from the shelf or doorway.
Step 4: Take a photo
Open the bin and photograph what is inside. If important items are hidden below the top layer, add a note.
Step 5: Save the location
Use a practical location:
- Garage Shelf A
- Hall Closet Top Shelf
- Basement Shelf Left
- Storage Unit Front Right
- Kids' Closet Floor
- Under Bed Left
Step 6: Check whether the bin is too broad
If the bin feels vague, narrow it.
Instead of holiday, try:
- outdoor holiday lights
- gift wrap and ribbon
- ornaments and hooks
- tree skirt and stockings
- holiday table linens
The more specific the bin, the easier it is to find things later.
Storage Bins With Lids FAQs
What should I store in bins with lids?
Storage bins with lids work well for dry, grouped household items like holiday decor, guest linens, kids' clothes, camping gear, craft supplies, garage tools, sports gear, and moving overflow. They are best when the items inside make sense together and you can record what is in each bin.
Are storage bins with lids better than open bins?
Lidded bins are better when you want to stack containers, reduce dust, contain loose items, or store things for longer periods. Open bins can be better for items you use daily because you can grab things quickly. For hidden or long-term storage, lidded bins usually need a number, photo, and location record so they stay searchable.
Should I use clear storage bins or opaque bins with lids?
Clear bins give you a quick visual cue, while opaque bins can look cleaner and hide clutter. Either one can become hard to use once stacked, crowded, or stored high on a shelf. The best system is to number the bin, photograph the contents, and save the location so you can search later.
What should not go in plastic storage bins?
Be careful storing delicate fabrics, leather, important photos, documents, food, electronics, damp items, or highly valuable items in ordinary plastic bins. Some items need breathable storage, archival materials, climate control, waterproof/fireproof protection, or another safer option.
How do I label storage bins with lids?
Use a simple visible number on the outside, then keep the details in a searchable record. For example, Bin 3 might contain kids' winter coats, gloves, and boots and live on "Garage Shelf B." This avoids long labels that become outdated when contents change.
How can Totely help with storage bins with lids?
Totely helps you number bins, photograph contents, save exact locations, add notes, and search naturally later. Instead of opening every lidded bin, you can search for a real item like "holiday lights" or "guest sheets" and see the matching numbered bin with photo proof.
Keep the Lid. Add the Memory.
Storage bins with lids are useful because they protect, contain, and stack.
But once the lid closes, the bin needs a memory system.
Start with one area. Group items by how you will use them. Give each bin a simple number. Photograph the contents. Save the location. Keep frequently used bins easier to reach. Be careful with sensitive items that need special storage.
With Totely, each lidded bin can become searchable.
Simple outside. Specific inside.
That is how storage bins with lids stop becoming mystery bins.